You will solve the exercises for this course using a Linux shell. Start a Linux shell on your own computer. If you succeeded, you can mark this assignment as read (bottom of the page).
Start a Linux shell
The way to start a Linux shell differs from operating system to operating system. Below you find instructions for how to do this on Windows, macOS and Linux. Follow the instructions for the operating system that is installed on your computer.
Microsoft Windows
Microsoft Windows (since version 10) now supports Linux shells based on the Windows Subsystem for Linux1 (WSL). Using this subsystem, you can install a Linux distribution and use the corresponding Linux shell. To use WSL, you need to follow these steps2:
-
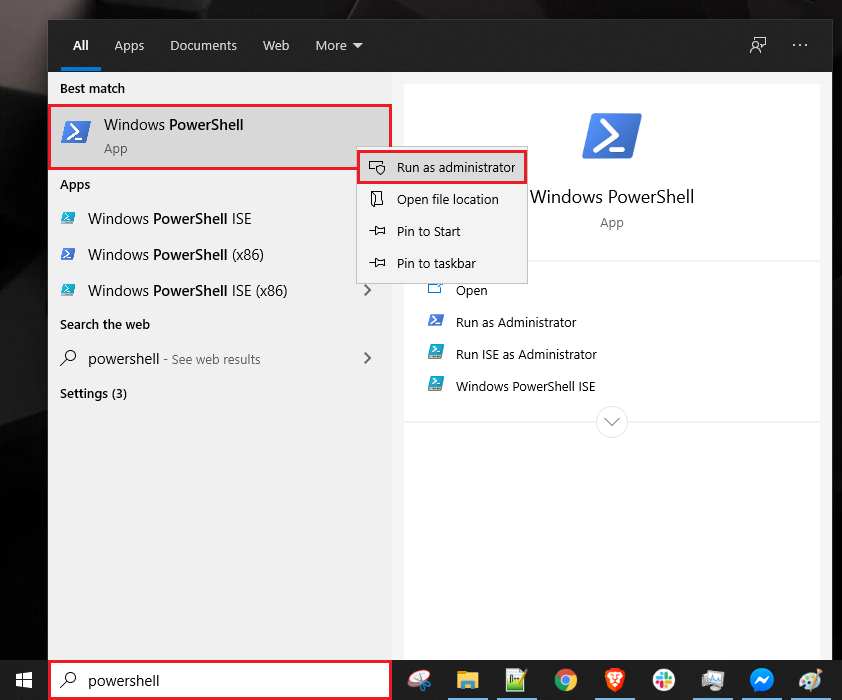
Open PowerShell3 as admin. To do this, search for
powershellin your start menu and right click on the Powershell icon. In the context menu that appears, click on “Run as administrator”.
-
Type the command
wsl --installin the PowerShell and press enter. The WSL is now activated. This commmand activates the most recent version of the Windows Subsystem for Linux en installs a standard Ubuntu Linux distribution. -
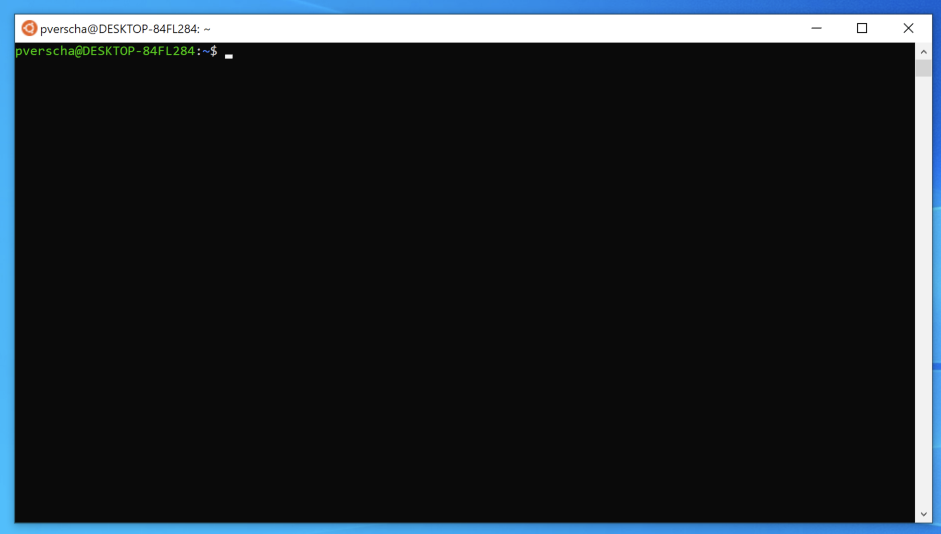
Now you can start a Linux shell on Windows by searching for and clicking on Ubuntu in your start menu. Eventually you should end up in this window:

Exchange files between Windows and Linux
If you want to access your Linux (WSL) files from Windows, open a WSL shell and type
explorer.exe. This opens the Windows Explorer in the current WSL directory. If you want to access your Windows files from WSL, open a WSL shell and navigate to the directory/mnt. Here you will find all your Windows drives. For example, theC:drive will be available under/mnt/c.
Start a Linux Shell from Windows Explorer
This manual4 explains how to add a shortcut for starting a Linux shell to the Windows Explorer context menu. This will launch WSL in the current directory of Windows Explorer.
Error: 0x80370114
Windows requires that the
Windows Hypervisor Platformis enabled. If you get this error, this is likely not the case. To enable this platform, clickstart, typewindows featuresand then click onTurn Windows features on or off. In the window that opens, search forWindows Hypervisor Platformen check the option. Afterwards, reboot your computer. Now the error should disappear.
macOS
the macOS operating system is based on Unix and has standard support for executing most Linux utilities through the command line. Until macOS version 10.14 the Bash shell was used by default, which we will use in this course. As from version 10.15 Bash was replaced by Zsh as the new default, but you can still execute scripts with Bash.
In general, working with Zsh instead of Bash should not pose any problems for the exercises until we start writing shell scripts. From that moment, it is important to always use the correct hashbang-rule (#!/bin/bash). Don’t panic if this does not mean anything to you yet. It will become clear throughout the semester.
To open a shell in macOS, simply launch the Terminal application:
-
Press ⌘ + Space, type
terminaland press enter. -
Now a window should appear that looks more or less like this:

Remark
Due to licensing issues, several utilities (grep, sed, vim, …) provided by default on macOS (and absolutely necessary for this course) are severly outdated. For most exercises however, this will not be a problem. It is possible however that some options are provided under a different flag, or not available at all. If you need a more recent version of one of these utilities, you can always install a new version using Homebrew5.
If you want to replace the standard utilities on macOS with GNU utilities, you can follow these steps:
-
Install HomeBrew according to the instructions on this website6.
-
Install the most popular GNU utilities via HomeBrew by executing this command in your terminal:
brew install autoconf bash binutils coreutils diffutils ed findutils flex gawk \ gnu-indent gnu-sed gnu-tar gnu-which gpatch grep gzip less m4 make nano \ screen watch wdiff wget zip -
Add the new utilities to your system’s
PATHvariable. To do this, open the file~/.zshrc(you can usenanofor this:nano ~/.zshrc) and paste the following lines at the bottom of this file:BREW_BIN="/usr/local/bin/brew" if [ -f "/opt/homebrew/bin/brew" ]; then BREW_BIN="/opt/homebrew/bin/brew" fi if type "${BREW_BIN}" &> /dev/null; then export BREW_PREFIX="$("${BREW_BIN}" --prefix)" for bindir in "${BREW_PREFIX}/opt/"*"/libexec/gnubin"; do export PATH=$bindir:$PATH; done for bindir in "${BREW_PREFIX}/opt/"*"/bin"; do export PATH=$bindir:$PATH; done for mandir in "${BREW_PREFIX}/opt/"*"/libexec/gnuman"; do export MANPATH=$mandir:$MANPATH; done for mandir in "${BREW_PREFIX}/opt/"*"/share/man/man1"; do export MANPATH=$mandir:$MANPATH; done fi -
Restart your terminal. If you now execute
grep --version, you should see that this is the GNU version (compiled in 2023 or later). -
If you ever want to revert to the original macOS utilities, simply remove the lines you added during step 3 from the
~/.zshrcfile and restart your terminal.
Linux
In case you already use Linux on your computer, simply open the Terminal app to enter the Linux shell. The instructions below are for Ubuntu, but a Linux shell can be launched on any other Linux distribution in a similar way.
-
Open the application overview by clicking on the button in the bottom right of the desktop. Type
terminaland press enter. -
Now the following window should appear:
